Sunday, October 25, 2015

Nikon 24-70mm f/2.8 VR

Nikon 24-70mm f/2.8 VR
YES - I have one. I am not just talking about unboxing either.
--------------------------------------
- Tamron 24-70mm VC has slightly better stabilization for video, but the Nikon more than makes up for it in sharpness, color rendition and light gathering/transmission (low noise).

- The New Nikon 24-70mm f/2.8 VR is much better for color  and for light gathering/tranmission (low noise) than than the older 24-70.
--------------------------------------


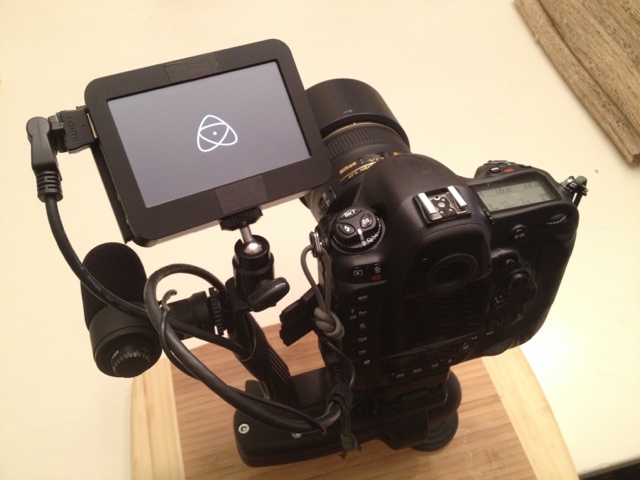
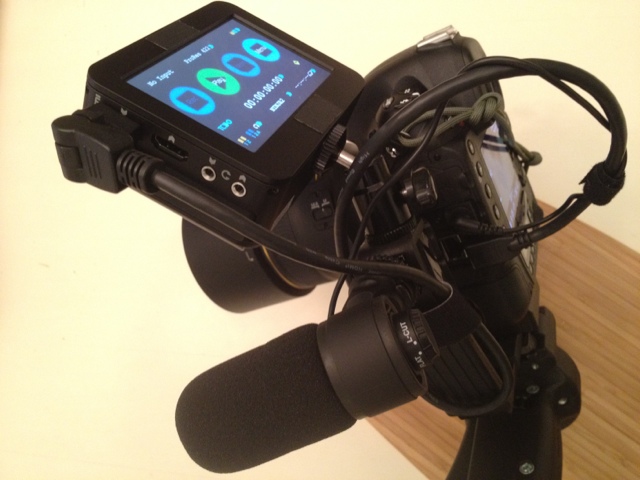
I tested the Tamron, the Nikon VR,  and the older Nikon 24-70 on both a D4s for stills and a D810 with an Atomos Shogun for video.

The older Nikon was not as fast or as accurate for focus. Video on the older Nikon was ok, but the colors were flat and it didn't take in as much light as the newer and wider (82mm) on the VR. My video on the D810 with the newer VR had richer and more accurate color and less noise at the same light level.

The Tamron does have slightly better image stabilization. You can quickly check by zooming to 70mm and then zooming into 100% on live view video and try to hand hold the camera. Any camera shake and image stabilization is quite clear when you turn on and off image stabilization. The color rendition on the Tamron was always a bit flat and the sharpness never really got to that of the Nikon. Now you can see the difference in video immediately and on stills the newer Nikon blows the Tamron away.

My advice - dump the Tamron and the older Nikon 24-70 and get the new one. It is that much better. The old one is great in great light (or with flash), but the new one looks much better in any light and in low light there is no comparison for light gathering, light transmission and color rendition.

Have fun and I hope that you find this useful.

I will try to post more later, but I can't post a comparison video since I dumped both of the older lenses.

(And no making fun of the cat pic - it is good for seeing detail. This one was shot in lower light, but not completely dark.)


Working with iPhone video

Working with iPhone video - use iMovie
-------------------------------------------
- Horizontal ONLY
- Use iMovie on Mac for editing
- lead in and out (PLEASE )
-------------------------------------------

OK - So after sweating through a marathon office video which was shot all on iPhone by the average person, I decided to come up with some simple notes.

I usually shoot to an Atomos Shogun or Atomos Ninja straight to ProRes 422HQ these days to simplify editing, etc.

For this project I was handed a ton of random iPhone footage. What a mess. Ok, where to start?
The usual process that I use is to transcode the footage, converting it from MP4 to ProRes for editing in Smoke and Davinci Resolve. Ha Ha Ha. I tried Premiere Pro. That was a no go as well. It seems that the iPhone video just does best in iMovie. It really does. All of the others had transcode problems all the way from fuzzy video to audio and video skipping.

So - iMovie.
Get the latest version that will work on your machine. Then connect it to a big monitor since Apple hasn't released a 17 macbook pro inch since - what 2011? Good grief. A lot of people don't have a desktop anymore since it isn't portable. Sure - I have a workstation at work. It's a PC. I still use my Macbook Pro 17 inch from 2009 for photo's etc. I tried to persuade the powers that be to get me a 5k iMac for work, but I still find that I do a lot on my laptop. In this case, the final video would have to be added by someone else, so I set it up on their laptop and plugged in a larger screen.

The footage was shot about half and half vertical and horizontal on the iPhone. Bad Bad. Always shoot HORIZONTAL! That will give you 1920x1080 and not 608x1080. I'm not sure what format that is. Also, cutting between Horizontal and Vertical shots is just nuts. Think about watching a movie and having to rotate the screen. Photos can be all kinds of crops and resolutions, video can't. Oh - and iMovie is not full of features and it won't crop properly on that so just forget that.

Also, use the same iPhone if possible. (At least the same version.) The video will cut together much better if you do. Colors will match better, etc.

Organization. Ah - gotta love iMovie - nope. In iMovie you can sort by name or date and time. I recommend keeping a log of shots by date, time and duration. (Try not to be too productive in one minute, since the log is by the minute...)When you go to edit, you can turn on the (I) information tab on the clip, under Adjust, and turn on the skimmer info under View. This will allow you to see the filename, the date, time and duration.  Will all of this lined up, you just drag your files in the correct cut order into the timeline. iMovie is quite simple. There are not a whole lot of features like most track editors have which iMovie does not, but hey - you are shooting on an iPhone.  I created an Event named All Video and another called USED. As I used each of my clips from the pile I moved them into the USED. This allowed me to search through fewer clips in the All Video folder and helped me keep my selects separate from the giant pile.  Setting up like this makes things much easier and faster.

Don't forget leads on front and back of the clip. Also - try not to laugh in the background - we might need that audio.

With voice pieces you can boost the volume of the audio and use the voice enhance audio filter. It seems to work well.

You can roughly do in's and outs, but if you need to cut a clip in the middle you will have to drop multiple copies into the timeline since there is no ability to slice the media in the timeline. You'll get the hang of it after a while, but it can make the inserts a bit annoying if you need to pause the primary video, drop in a clip, and then restart the main video.

As this was a corporate internal video,  I can't post it here.

I hope that you find this helpful.


A quick summary of other advice on shooting iPhone video:
http://wistia.com/library/shooting-video-with-an-iphone


Monday, January 26, 2015

Adding USB 3 to a 17 inch Macbook Pro late 2009

Adding USB 3 to a 17 inch Macbook Pro late 2009
(Mavericks)

This one works really well. Full Speed, no errors.

4 Port USB 3.0 HUB to ExpressCard Express Card 34 34mm Adapter Converter 5.0Gbps FL1100 Chipset


There are patches and workarounds for using it with Yosemite, but with Mavericks it works great for me. I needed the USB 3 port since I got and Atomos Shogun and the reader is USB 3 and not Firewire 800. I am still using the old 17" Macbook Pro- until Apple makes a new version...

Friday, October 10, 2014

Video for Nikon: D810 and D4s ISO limits and lenses

Video for Nikon: D810 and D4s ISO limits and lenses, tripods, monopods, etc.

=Summary==========================================================
UPDATE: D810 much better quality video than D4s. The D4s has soft video in my opinion except 2.7crop on Standard which suffers from noise in low light. I  have found that in low light I use the D4s on Standard, otherwise I ALWAYS use the D810 on FLAT.

ISO for video:
D810  64-2500
D4s    200-12800 (try to stick with 10k or less)

Nikon 70-200mm f/2.8 VR II
Tamron 24-70mm f/2.8 Di VC USD 
both work great for Image Stabilization, hand held or vehicle.
The video from the 810 on Flat really does look better to me. (using a Atomos Shogun)
=================================================================
UPDATE: 9/25/2015: After a year with D810 and D4s - unless you shoot video in low light, use the D810 and not the D4s.  The D810 on FLAT is just phenomenal. If you have great glass it really is wonderful. The D4s for full frame video is poor.(not sharp)  The D4s is a great still camera  - sharp, fast, simply the best; but for video - put it away. I am going to do more playing with 2.7x crop. I have tried all kinds of profiles, Flaat10-12p, Tassin, Cineflat, VH  Pseudolog. They all are the same. Video from the D4s full frame is just fuzzy and in no way approaches the quality of the video from the D810. That is the honest truth. See the below images.
D810 FLAT

D4s FX VH Pseudolog

D4s 2.7x crop VH Pseudolog
First - no making fun of the cat pics. It is good to use a furry animal so that you see the fine details. All three are pulls from video (using DaVinci Resolve) at ISO 1000 WB 2500K on a Tamron 24-70mm f/2.8 Di VC USD at F4 with image stabilization on. The camera was on a tripod. Video is never as sharp as stills, but I am trying to avoid splitting hairs here. The D810 on Flat is just wonderful for video. The D4s on FX is murky. The D4s on 2.7x crop looks good, but it is at 2.7x crop. 2.7x crop also suffers from increased noise and less accurate metering than the FX mode. Look at the fabric texture on the couch and the blanket. On the D810 it looks just like a still. Then look at the focus on the color card. It is at F4 and the card was just as in focus as the animal's eyes which was the primary focus point. To focus I zoomed in 100% and manually adjusted for the best possible focus. Look how fuzzy it is with the D4s in FX (full frame).  I am going to continue to update, but unless you are shooting low light video go with the d810 it really is much cleaner. You do have to watch the noise on the video over 2000 on up if the lighting is dim. If shooting in lower light you can go with the D4s on FX and Standard, which I have found to be the option for the best video on the D4s. It will be a bit soft, but it will work in very low light.

Bottom Line usable ISO for video: (shooting 24p  1/50s: Many shoots in different environments.)
D810  64-2500
D4s    200-12800 (try to stick with 10k or less)
Above those numbers things start to get truly grainy. Remember to shoot with the flat profile on the D810 if you plan on grading later. (You can get close creating a similar setting manually in the D4s. Cineflat, Flaat12p, and VH Pseudolog are profiles people have made that are on the net.)  I would not recommend using anything by Standard on the D4s since it seems to be optimized for the best video on Standard  I have heard that the Sony FS-700 does well to 56k, but I haven't tried it.

If you're in a car and you don't have $3-15k to spend on a gyro stabilizer - No Problem. Get these (especially the Tamron for the zoom range in the vehicle.)
Nikon 70-200mm f/2.8 VR II
Tamron 24-70mm f/2.8 Di VC USD

Until Nikon comes out with a 24-70mm 2.8 VR II the Tamron is just going to have to do. The Nikon 16-35mm just doesn't do well at 35 and I prefer a 50mm for facing forward. The VR or VC does a great job of taking out the vibration. The vehicle video is unusable without this.

If you are shooting on solid ground on a tripod then I recommend the 24, 35, 58, and 85 f/1.4 or the fantastic 200mm f/2.0 (you'll have to back up... even more so for the 400mm f/2.8  ;) which is also beautiful for video)

Need a 10 stop ND filter? You will need one if you are planning on shooting video at 24p (1/50s) outside in bright sunlight. (Yeah - just try to scrim the cars on the road while you are driving.) Look at this article. http://www.the-digital-picture.com/Reviews/10-Stop-Neutral-Density-Filter.aspx 
Yes, you might be able to get by with a 5-6 stop ND filter. Singh-Ray makes a 5 stop Mor-Slo too. I use the Singh-Ray Mor-Slo 5 stop and the Singh-Ray 3 stop filters. I can use one or the other or stack them both.  The Tamron 24-70mm f/2.8 Di VC USD does just fine with both stacked, with minimal vignetting. The Tamron has slight vignetting at 24mm as it is and two stacked filters does not add much to this.

Need a 6 stop filter for your Nikon 200mm f/2.0 get this Hoya 52mm Pro 1 ND 64x Sorry - I couldn't find a 10 stop that is thin enough to fit. This one works beautifully. It should work for the 400mm too.

Tripod: There are so many. You want a solid one with a real fluid head. I went with what the News guys use. They use the latest Sachtler head with the hotpod. I was fortunate enough to buy a used 18plus head on a hot pod a few years ago. It is smooth. It is made for heavier cameras, so I use it backwards on my lighter setups. When I put the 400mm on it works beautifully. If you have never used the Sachtler hotpod - it is a treat. You just slide the middle cross leg piece to the right spot on the bar it slides on and out drop the legs. Push the cross piece all the way down and they lock. Then press down on the leveling lever and level the head. It takes seconds. That is probably why the News guys use them. They are also solid as a rock, which is key for video. I have a set of Miller Sticks which I use if I am in the woods or need to go low, but it is nowhere near as solid or as easy to setup and move as the hotpod. A demo of the hotpod is here

Monopod: In a pinch I use the Manfrotto video monopod with 500 series head. It works quite well. It is great with the Nikon 70-200mm f/2.8 VR II  for shooting kids sports video.

Steadicam: I use the Steadicam pilot. It does well. Go with the Scout if you are flying something a bit heavier. I recommend that most people stick to the tripod. Steadicams can be frustrating if you don't have time to practice and the extra patience and coordination that they take. Also hand holding the Image Stabilized lenses works quite will in a pinch.

I must apologize for the lack of video or still shots. I will post them when I have the time. I am going to make sure to put iPhone video shots there for comparison as well. People think that the iPhone takes great video. The iPhone has its range. It does well in bright light. When it gets really dark though, it just can't do it. (The iphone screen is black by the time you go to 6400 ISO on the D4s. Remember, this is video so we are using 1/50 sec shutter speed.)

There is a review with some video here on Fstoppers (starting at 13:30) It doesn't cover the D4s, but that (for video) one goes to ISO 10k cleanly and 12800 pretty well.

Friday, September 26, 2014

Nagra SD

Nagra SD recorder
Nagra SD recorder - photo borrowed from BHPhotoVideo

Summary:
Best handheld recorder that I have ever used. The preamps are up there with Nagra's recorders like the LB, but it is in a handheld package.


Not too long ago I picked up the Nagra SD recorder. I have to say that it has taken my audio recording to a whole new level. There are plenty of good ways to get excellent audio in an external recorder for your high end videos. To capture the ambient sound and stereo movement across the frame this thing is hard to beat. I use the Green band microphone for stereo recordings. Mounted on top of the camera, when  the audio is either cut into the  video in post or plugged directly into the camera from the line out, you would think you were there. I recommend cutting the audio in from the recorder in post if you have the time since it is better quality than the line out feed to the camera.

I recommend picking up the Nagra NM-MICSII stereo Green band microphone and the Nagra NM-MICMC mono White band microphone. The green is great for stereo ambient sound and the white is great for areas where there is an echo. You have to buy the microphones separately. Oh - and the white sounds just like the green except it is mono and is better than the green for high echo areas.

Great reviews are here:
BHphoto review of the Nagra SD (has sample Video with audio)
Wildlife Sound Recording Society (has sample audio)

This is my go to audio recorder. It truly is broadcast quality in your hand. Yes, I have used the Marantz, the H4n, and many others. This thing is just better. If you looking for a broadcast quality recorder for some kind of National Public Radio type recording of an event, then this is the the perfect solution.

It comes with a single XLR input cord. A stereo XLR (two connector) input cord can be purchased separately. Using the cords, one can connect one or two XLR inputs to the Nagra SD.

Keep in mind that I am using this for quick interviews or recording performances when I am primarily shooting stills. (I am frequently asked to "just get a few short videos.") This is not a complete audio solution for recording by any means. It is just and easy way to truly get broadcast quality (background sound primarily for me) into your video for under the usual $3k mark and have such a small handheld that you can just carry with you. There are plenty of other microphones like the Senken CS3e , Sennheiser MKH-416, Schoeps CMIT-5u; Mixers and recorders from Sound Devices (Mixpre-D as a small example used by DSLR run and gun people), Nagra and so many more.

I still use the Rode Video Mic Pro for run and gun interviews in loud areas (again - when asked to "just get a few short videos"), but is nowhere near the audio quality or pickup of this thing. I use the Rode usually to cut out and isolate the sound and then add in the real background from the Nagra SD recorder.


I will be showing my newer audio/video setup sometime soon.


I hope that you find this helpful.


Wednesday, September 17, 2014

Light Grenades

Light Grenade:
I was asked by a friend to write a quick piece on this.


At a recent wedding I pulled out my go to quick lighting solution, the light grenade. It is merely a small portable light stand with a umbrella holder and bracket on the top. I usually put two SB-900's on the bracket so that I don't overheat or burn them out with the added bonus of getting more light. These things fold up so small I can carry three of them in a small bag folded up.

Just set it up, point the umbrella at the subject, (at a 45 degree angle to the subject usually) and fire. If I am using Nikon flashes I use TTL. If I am using everything on manual, I set the umbrella flashes to 1/16 to start and work my way up.

It is called a light grenade because while it does throw soft light through the umbrella on the subject, it throws light everywhere.

It consists of:
Manfrotto 5001B
Lastolite LL_LA2423 TriFlash Bracket
Impact S3243 White Translucent Umbrella


This is not an original idea of mine. Many travel photographers have been using this for years. You can find it clearly laid out by Bob Krist is the Nikon CLS lighting system video.CLS Lighting Video with Bob Krist and Joe McNally Check the video at 1:15:00 and you can watch Bob unpack and explain his kit.

I put the strap on mine so that I can carry one around in its own as a portable lighting solution.


I hope that you find this helpful.


Workflow for Weddings

Workflow for Weddings

(Excerpted from post on Capture One Pro) - on user request

Bottom line - My workflow:
1) Shoot RAW+JPG. RAW to Card 1 JPG to Card 2.  I can always hand off the JPG card to anyone for them to use immediately if necessary.
2) IMPORT : Photo Mechanic
3) EDIT :  Capture One Pro 8
Use Sessions so that I can edit in original directories and not have a huge catalog. Also, if I really need to use Photoshop or another plugin because I have a solution that I have used in the past I can.
4) SEND Proofs: Smugmug
5) PRINT: Imageprint
to my Epson 3880. To really get good proofs and understand printing you need to use a good printer. To not waste time figuring out print profiles (because you are in the photography and not the printing business) let Imageprint figure out the perfect color, paper, and ink settings for you.

Don't use Catalogs!:
Use Sessions
But - leave the files right where they are when you import. Don't import files into Capture one. Just access them in the file browser.

Lightroom, iPhoto, and Aperature use a Catalog. Capture One Pro 8 can use catalogs as well. But - even better, with Adobe Bridge or Capture One Pro you can just look in a directory at the files. There is absolutely no need to import your photos into some ridiculously huge, slow and unstable catalog. I have always edited files in the directory, avoiding catalogs. I usually import my photos with Photo Mechanic the worlds fastest import and file viewer. I set up a hierarchy of directories for my files starting with date. (2014_09_17 Mary and John Smith Wedding) I can then cull down my photos to only the selects that I can then edit. I used to use Photoshop through Bridge and Adobe Camera RAW. (Now all of that has gone creative cloud and is far too unwieldy, slow and expensive.) A full 8 hour plus wedding set on the D4s and D810 takes only 1 hour to cull, and at most 3 hours to edit in post for the proof prints. (No. I am not kidding. Just ask Emily Karcher of Emily Karcher Photography if you need a real person that can attest to this. (Don't buy into something that you only see or hear online. A lot of what you see is staged (models for "Wedding Shoots") and for advertising.))

How is it so fast. Two things:
1) Cull down your photos into selects first
2) Do not import into a Catalog - Use the files in a directory where they are.

Cull down your photos into selects first. Select the photo's you like, rate them etc in Photo Mechanic.(2014_09_17 Mary and John Smith Wedding) Then move them or copy them into a Selects directory under that main directory. (2014_09_17 Mary and John Smith Wedding/Selects) Open the Selects directory in Capture One Pro and do your editing and corrections. Then export your photos to the Send directory. (2014_09_17 Mary and John Smith Wedding/Send)If I still need to do some crazy edits in Photoshop I can do that on the Selects or Send files.

If you shoot a monster like the Nikon D810, Canon 5D Mark III, or any medium format camera you know how big those files are. If you cull down your files first and then don't use catalogs, you will only have the photos that you need to edit in memory or in your sorted directory. This is so much faster than asking your computer to look at a 40GB directory fill of 40MB files. (Or worse - One giant 200GB Catalog containing not only this shoot, but several of the last ones. Keep in mind that anything over 4GB in size is a royal pain for a computer. Just try to copy a giant video file some time.) I do my editing on a 2008 Macbook Pro with 8GB of RAM. (I needed the RAM for 3D graphics and rendering.)  

Do not import into a Catalog - Use the files in a directory where they are.
Using the files in the directory where they are you can edit your selects with whatever external editor or plugin that you want.Using a Catalog forces you to waste time, importing and exporting with no added benefit. Also archiving is easy. Just grab the entire directory (2014_09_17 Mary and John Smith Wedding), back it up to both of your spare backup drives (BOTH!) and then delete the 40 GB monster (2014_09_17 Mary and John Smith Wedding) from your computer's hard drive. A Catalog keeps growing and growing and becomes overly cumbersome.  (Plugins are quickly becoming stand alone apps now that don't require Photoshop. Awesome! Now you can process files with your favorite settings automatically in batches without the $700 purchase of Photoshop with Bridge.)

Capture One Pro 8

Capture One Pro 8: Better than ever!
(Also - workflow for weddings at bottom)

Killer features:
- No need for Catalogs!
- Variants
- Multiple focus windows for image review or tethered shooting 

Best tethered shooting app!

Killer feature (for me)- Multiple focus windows for image review or tethered shooting!!!!

Capture One 8
(Yes that picture is from Capture One Pro 7) I just happened to take a screen shot to show how one can compare two photos side by side while reviewing photos or while tethered. The two focus windows on the left I used for checking two separate focus points on each photo. You can have many of these focus windows.

Capture One 8
Ok - check this out. It is two sessions (two windows) The left one is the my best shot up until now, the right shot is the latest tethered shot. The left side stays the same and the right side changes with each new shot. If I am shooting tethered this allows me to check focus (and all edits, crops etc.) on the left photo and then see if the right photo is better. If it is, I select that photo in the left window as my keeper and keep shooting. I can even set different edits to crop and keystoning (or any effects or edits) on the right tethered window and each successive shot takes on the same settings from the last shot. Amazing!

UPDATE:
After setting this up I rebooted my computer for some Apple software update and guess what - when I started Capture One Pro 8 it started up with both session windows open the exact same way with the same files open!!!! How awesome. So if my machine goes down, or I have to set up for a quick tethered shoot or stop editing and have to restart or whatever - I can just start up Capture One Pro 8 and I am right back where I left off. Brilliant!!!

Variants:
Capture One Pro


Yes - I reused the photo. The left photo is variant one and the right side is variant 2 of the same photo. The best part about this is that you can edit the heck out of a photo and then just hit a button to create a new variant that has the same edits and settings (clone) or a new variant that has no changes to the original file (new variant). This is unlike all of the other photo apps that I have used where you have to copy the original file before you even start and then work in layers, etc and turn them on and off so that you end up with multiple staged files all over the place. These edits are in an XMP file so there is no overhead and it doesn't take up space on your hard drive or in RAM.


No need for Catalogs!: (Workflow for Weddings)
Use Sessions
But - leave the files right where they are when you import. Don't import files into Capture one. Just access them in the file browser.

Lightroom uses a Catalog. Capture One Pro 8 can use catalogs as well. But - even better, you can just look in a directory at the files. There is absolutely no need to import your photos into some ridiculously huge, slow and unstable catalog. I have always editing files in the directory, avoiding catalogs. I usually import my photos with Photo Mechanic the worlds fastest import and file viewer. I set up a hierarchy of directories for my files starting with date. (2014_09_17 Mary and John Smith Wedding) I can then cull down my photos to only the selects that I can then edit. I used to use Photoshop through Bridge and Adobe Camera RAW. (Now all of that has gone creative cloud and is far too unwieldy, slow and expensive.) A full 8 hour plus wedding set on the D4s and D810 takes only 1 hour to cull, and at most 3 hours to edit in post for the proof prints. (No. I am not kidding. Just ask Emily Karcher of Emily Karcher Photography if you need a real person that can attest to this. (Don't buy into something that you only see or hear online. A lot of what you see is staged (models for "Wedding Shoots") and for advertising.))

How is it so fast. Two things:
1) Cull down your photos into selects first
2) Do not import into a Catalog - Use the files in a directory where they are.

Cull down your photos into selects first. Select the photo's you like, rate them etc in Photo Mechanic.(2014_09_17 Mary and John Smith Wedding) Then move them or copy them into a Selects directory under that main directory. (2014_09_17 Mary and John Smith Wedding/Selects) Open the Selects directory in Capture One Pro and do your editing and corrections. Then export your photos to the Send directory. (2014_09_17 Mary and John Smith Wedding/Send)If I still need to do some crazy edits in Photoshop I can do that on the Selects or Send files.

If you shoot a monster like the Nikon D810, Canon 5D Mark III, or any medium format camera you know how big those files are. If you cull down your files first and then don't use catalogs, you will only have the photos that you need to edit in memory or in your sorted directory. This is so much faster than asking your computer to look at a 40GB directory fill of 40MB files. (Or worse - One giant 200GB Catalog containing not only this shoot, but several of the last ones. Keep in mind that anything over 4GB in size is a royal pain for a computer. Just try to copy a giant video file some time.) I do my editing on a 2008 Macbook Pro with 8GB of RAM. (I needed the RAM for 3D graphics and rendering.)  

Do not import into a Catalog - Use the files in a directory where they are.
Using the files in the directory where they are you can edit your selects with whatever external editor or plugin that you want.Using a Catalog forces you to waste time, importing and exporting with no added benefit. Also archiving is easy. Just grab the entire directory (2014_09_17 Mary and John Smith Wedding), back it up to both of your spare backup drives (BOTH!) and then delete the 40 GB monster (2014_09_17 Mary and John Smith Wedding) from your computer's hard drive. A Catalog keeps growing and growing and becomes overly cumbersome.  (Plugins are quickly becoming stand alone apps now that don't require Photoshop. Awesome! Now you can process files with your favorite settings automatically in batches without the $700 purchase of Photoshop.)

Other Features for me:
Tethered Live View for the D4s D3 D810
Exporting
Lens Correction - Supports latest Nikon and Canon (and other DLSR) lenses and selects them automatically.
Layers
Spot correction and Cloning
Great Black and White Tool
Great RAW rendering engine
Output Sharpening for print
Single Pixel Noise Reduction for Night Photos- Long Exposure
View Proof Profile - Soft proofing
Hot Folder - Allows you to use whatever camera control app you want and still have the photos pop up automatically in the Capture One Pro session.
Capture Pilot - photo review and tethering control on iPad or iPhone
Free Capture One Pro 8 Training Videos Online Just search Capture One Pro 8 or here at Phase One

Full Blown review of what it is new.

Also:
This is really Phase One's only software product (Ok - there's Media Pro)- and it is dedicated to cameras - It is updated with new cameras and lens profiles as well as RAW conversion continuously. Adobe has so many other apps to dedicate people to. They do update the camera RAW, but I am not sure they take the time to profile all of the cameras and lenses like DXO or Phase One.  Phase One makes digital backs and makes this application to control them and other digital backs.

What it doesn't do:
Capture One Pro 8 is not Photoshop. You are not going to use it for keying or compositing or any of that. Capture One has the Spot Correction and Cloning tools to remove problem areas in an image, but it is not a full blown compositing solution.  Photoshop is great, but do you drive an efficient car to work or a car, truck, boat, airplane, submarine, crane, bulldozer, all in one? You get the point.

Bottom line - My workflow:
1) Shoot RAW+JPG. RAW to Card 1 JPG to Card 2.  I can always hand off the JPG card to anyone for them to use immediately if necessary.
2) IMPORT : Photo Mechanic
3) EDIT :  Capture One Pro 8
Use Sessions so that I can edit in original directories and not have a huge catalog. Also If I really need to use Photoshop or another plugin because I have a solution that I have used in the past I can.
4) SEND Proofs: Smugmug
5) PRINT: Imageprint
to my Epson 3880. To really get good proofs and understand printing you need to use a good printer. To not waste time figuring out print profiles (because you are in the photography and not the printing business) let Imageprint figure out the perfect color, paper, and ink settings for you.

I  hope that you find this helpful.


Monday, April 21, 2014

Nikon D4s - Just a comment

Nikon D4s - Just a comment

I have been a bit busy, but I felt that I would be doing a disservice to people if I did not write something brief about the D4s.

If you have even thought about upgrading from the D4 to the D4s, do not wait. The D4s is nothing short of amazing when compared to the D4 as far as ACCURATE and FAST AUTO FOCUS, color accuracy, color depth, and straight to JPEG shooting. Yes, the 2.7 crop video is beautifully sharp as well. If you shoot primes like the 35, 58, 85, 200, do not walk, run to the nearest store and swap your D4 for the D4s. It is truly amazing. The focus locks on moving subjects and is dead on. This is the best auto focus that I have seen on any camera ever.

There are plenty of reviews out there from people who have merely unboxed the D4s and never shot with it. Those who have can't help but rave about it.

Example comments:

http://news.coreyrich.com/2014/03/ask-corey-is-the-nikon-d4s-noticeably-sharper-than-the-d4-in-fx-mode/


Monday, December 9, 2013

Nikon 58mm 1.4g

Nikon 58mm 1.4g

Bottom line: Impressive lens. It is a Nikon prime lens like the 24, 35, or 85 and as a prime it does not focus as fast or as "accurately" at 1.4 as one of the Nikon 2.8 zooms do at f 8. See my previous article on the prime focusing speed.

==================================================================
UPDATE:
IF you are having trouble with AF accuracy on a Nikon 58mm 1.4g , I recommend that you send it in for warranty service and explain the problems that you are having. After sending the original lens in that was used for this article it came back:
CKD AUTO FOCUS OPERATION
CKD FOCUS TRACKING
CKD EXPOSURE
CKD COMMUNICATION
ADJ DEFOCUS COTROL

(Yes that is how control was spelled on the sheet.) The lens works better than ever. It is now spot on for eye focus for portraits without any AF Fine tuning. I plan on experimenting with optimum distances for the best look. I now look at the 58 f1.4 as the Nikon 200 f2.0 when you can't back up to get the shot. (and you don't want to carry that beast.) The bokeh is just beautiful like the 200 f2.0 and when used properly focus is spot on.
==================================================================

Advice(please read below): For portraits, using eyes as the focus point, using the center AF point, I shoot it at AF Fine tune +20, saving RAW+JPG , with the JPG set at maximum sharpness on the D4 and have the center button on the multi-selector set to zoom medium on press during image review so that I can check the focus on the shot.

As usual, when a new piece of hardware comes out, there are many different initial opinions written on the spur of the moment with little actual use of the new item. That is the case with the Nikon 58mm 1.4g
The naysayers have taken to two issues. The sharpness wide open at 1.4 and the inconsistent focus. I felt like I had heard this before. Well, I did. When the Nikon 24mm 1.4g came out there were the same complaints.Ah and the Nikon 35mm 1.4g as well. So why are some people attacking this lens? Enh - who cares. With any new piece of photography equipment there are always opinions. I recommend that you rent it, give it a try with your camera setup the way you use it and if it works for you, ditch the 50mm 1.4g and use this in its place.

I got the chance to do a quick test on this lens the other day. If you are concerned about any AF front focus or back focus issues, you can look at the below images. The lens was focused on the book to the left of the ruler. The 20cm line was even with the plane of the book.
Nikon 58mm 1.4G at 1.4 on a D4 full sharpness  (crop at 6ft)

Nikon 58mm 1.4G at 1.4 on a D4 no sharpness (crop at 6ft)
This test was more of a check for myself to see if there are any front/back focusing issues with the lens that I tested. This does not determine how well the lens will focus on subjects, especially low contrast of moving subjects.

I found some good advice on photo.net on AF Fine tune that I figured I would quote:

"The fine tune adjustment is also dependent on the focus distance, and may also be dependent on the aperture and color of the light (though the latter two are less clear effects than the distance).
I think a reasonable approach is to determine the correction at around 30x focal length, and then investigate how the correction varies towards long distances. That's what I do, anyway. I think Nikon should urgently provide users with the means of storing distance dependent fine tune settings for each lens. It should be possible for the camera to determine the distance from the D or G lens, and apply the appropriate correction, interpolating linearly between the ranges.
Fine tune adjustment in my experience requires considerable care and repetition is an excellent idea; any single focus operation can give quite a large variability in the result, but by making many repetitions, a reasonable estimate of the mean error can be made. Also it is a good idea to have reasonably bright lighting conditions when doing these experiments." - Ilkka Nissila

I have had the chance to use the Nikon 58mm 1.4g for a few days now. I have to say that I am impressed. It is a Nikon prime, which means that while it does go to 1.4, it is going to have a slower and less "accurate" Autofocus than the 2.8 zooms like the 24-70mm 2.8, 70-200mm 2.8, or the 14-24mm 2.8. I say accurate because, as you can read by the above quote, there are many difficulties that an Autofocus encounters and these are seen very clearly at a wide aperture of f 1.4. The depth of field is so shallow that any focus errors are immediately apparent.

As you can see from above, when I shot at test targets there appeared to be little or no AF fine tuning needed. What I found when I shot at actual subjects focusing on the eyes was a bit different. I found that when I set the AF fine tune to +20 on the D4 I got more consistently focused shots. It appeared that the AF sensors were focusing on the tips of the eyelashes on my children and the eyeballs were out of focus. It may be that my children have exceedingly long eyelashes, but I found that with this setting on my D4 I had more success.

I do want to say, that I am not in the habit of checking focus on every shot, but from now on I just might be. After I had some initial frustration with checking my focus I set up my D4 the way many commercial and wedding photographers set up theirs. I set the center button of the multi-selector to zoom medium during image playback. That way I can zoom in to 100% on the image (zoom medium) and check the focus on each shot. This is under Controls, f1 Multi selector center button, playback mode, zoom on/off, Medium Magnification. Then I set my fcn button on the front of the camera to pull up the first item on my menu, which is AF Fine tune. This way I could pop the image to 100% and then pop straight to AF fine tune and adjust the fine tune settings.

Some people may say +20, that's crazy! There must be something wrong with the lens. Well, not really. I know where I need to focus and how to get the best results for my subject. With the way I shoot portraits, using the eyes as targets, for this lens, this setting works best. For sports I go with center body focus and adjust accordingly, so this shift of focus for more consistent shots is nothing new. Photographers have done this for years for landscapes, focusing to the hyperfocal distance to ensure that as much as possible in the shot is in focus. While it is not the exact same thing, it is not a new concept.

For those people who are used to zooms and lenses with apertures of f 2.8 or greater I would like to offer some advice. Don't expect any of the f 1.4 primes to focus as quickly or as "accurately" as the f 2.8 lenses. The depth of field on f 2.8 and higher lenses is so much deeper that a lot more is in focus in the frame and the picture looks sharper and more in focus from edge to edge. For group portraits where I want everyone in focus, I stop down to 5.6 or greater to make sure every face in the photo is in focus.  The Nikon f 2.8 zooms focus so quickly and are so sharp that people expect the primes to be even better. Well, optics at 1.4 are much more complicated and as a result the focus is much slower. Trying to photograph children with a prime can be exceedingly difficult. (D4 prime article)

Summary of what I found:
The 58 f/1.4 , like the 24 f /1.4, or the 200 f/ 2.0 has it's own character and look. It has a very tight focus and shallow depth of field for a 58mm. It is also a low light full color monster. By this I mean that in low light it pulls out colors like the 24mm f/1.4 in near pitch black conditions. The optical gymnastics involved in getting all of this into one lens leaves it a little less sharp at 1.4 as some distances than the 85mm is at its optimum distance. At other distances the 58 is very sharp. I will have to nail down what the 58mm's optimum distance is with some time and trial and error. (As always if you are a sharpness and chromatic aberration obsessed person who checks all of their photos at 100 or 200% then you might not be satisfied unless you get a Zeiss Otus. The Otus is a great lens (either 55 or 85mm. I have used both, but don't own either). You will need a tripod and a still subject though to manually focus that thing. It also has its optimum sharpness distances. )

 I will attempt to illustrate what I found with the below images:

I will start with a comparison of the 58mm and the 85mm at 1.4 on the same subject. Please refer to vigorotaku.com for the full size images. I have posted the full sized original JPG images to that you can pixel peep if you want. (Smugmug converts all NEF's to JPG, so I uploaded the JPG's instead of NEF's so that the original data would hopefully be preserved.) All of these were shot with AF fine tune +20 and portraits were all eye focus, AF-C focus (not focus+release) 51points d9.

Nikon 58mm f/1.4g on D4 at 1.4

Look at the color and out of focus areas. Also the eyelash color is perfect.
Nikon 85mm f/1.4g on D4 at 1.4

Very sharp, but flatter color. (less vibrant colors and less color depth) At the optimum distance for the 85mm f/1.4g
Nikon 58mm f/1.4g on D4 at 1.4 zoomed 100%. Sharpening is 5. It may appear a bit soft, but with some additional sharpening one would be hard pressed to see the difference from the below 85mm shot on even a 10"x14" print.
Nikon 85mm f/1.4g on D4 at 1.4 zoomed 100%. Sharpening is 5

Nikon 58mm f/1.4g on D4 at 1.4

Look at the color and out of focus areas. Also the eyelash color is perfect.
Nikon 85mm f/1.4g on D4 at 1.4

Very sharp, but flatter color. (less vibrant colors and less color depth) At the optimum distance for the 85mm f/1.4g.( One thing to keep in mind when looking at sharpness is, how sharp is your subject? I learned that while doing macro work. When shooting unsharp features on flowers, things aren't going to be sharper in the camera than the actual flower is in reality. (unless you set the sharpening to extra crispy) Also it can be difficult to focus, which is why we use manual for that. In this case, a baby's features are very smooth, so the auto focus tends to go with the eyelashes rather than the skin around the eye, as it does with adults. )
Nikon 58mm f/1.4g on D4 at 1.4 1/15s

(please ignore focus) In pitch black conditions. A test photo with the iphone was solid black. There is light from a clock and another behind camera. Ignore the focus, this one is about vibrant color in the darkness.

Nikon 50mm f/1.4g on D4 at 1.4 1/10s

(please ignore focus) Pitch black conditions. 1/10s vs 1/15s in order to get enough light.

Nikon 58mm f/1.4g on D4 at 1.4 1/40s
Nikon 50mm f/1.4g on D4 at 1.4 1/25s

Again, less color depth.
 Portraits:(Keep in mind - he's a kid and doesn't stay still for long. This is all autofocus.)
Nikon 58mm f/1.4g on D4 at 1.4

Head on, left eye focus

Nikon 58mm f/1.4g on D4 at 1.4

3/4, close eye focus

Nikon 58mm f/1.4g on D4 at 1.4

Profile, close eye focus, Christmas tree in the background. 4 feet away.


 Night shots:


Nikon 58mm f/1.4g on D4 at 1.4

Pitch black, side light from Christmas lights.

Nikon 58mm f/1.4g on D4 at 1.4

Red Christmas lights. Focusing and getting anything with red ambient light can be incredibly difficult.

Nikon 58mm f/1.4g on D4 at 2.2

I shot this at 2.2 to get the lights and a little more depth of field. Look at the Christmas lights for the amount of halo, etc.

Nikon 58mm f/1.4g on D4 at 2.2

Nikon 58mm f/1.4g on D4 at 1.4

Nikon 58mm f/1.4g on D4 at 1.4

Look at the detail on the branch as well as the lights in the background.


Nikon 58mm f/1.4g on D4 at 1.4 zoomed 100 percent

Look at the detail on the branch as well as the lights in the background. Look at the lack of color aberration on the background lights! (and the back lighting of the branch from the lights)


Additional focus discussion:

To illustrate the focus on the 58mm f/1.4g I have an additional shot, zoomed in to 100 percent.
Nikon 58mm f/1.4g on D4 at 1.4 AF fine tune off. Camera Focus point is on the red strip and center of the frame.

Nikon 58mm f/1.4g on D4 at 1.4 AF fine tune plus 20. Camera Focus point  is on the red strip and center of the frame.

If you look carefully, from the above photos you can see that the Autofocus is pretty much spot on without correction and is shifted to the rear in the plus 20 photo. I added these photos to illustrate what the autofocus fine tune adjustment looks like on a different target. In this case I would use AF fine tune off. I can do that easily by setting my fcn button on the front of the camera to pull up the first item on my menu, which is AF Fine tune. This way I can turn on and off AF fine tune quickly and easily when I need to. I do the same with the fast 24, 85, and 200 primes as well with different settings. One can always go to Live view and zoom to 100 percent, or 200 percent if your eyes are like mine, and manually focus to nail the focus. That really isn't possible with the kids though. ;)

I know that buying a lens can be a difficult decision, especially with all of the advice out there.

I hope that this helps.


One last note:  The 58mm f/1.4g is significantly lighter than the 24 or the 85. I wish it was heavier so that it balanced better on the D4 adding more stability to my shots.


Thanks to everyone who has taken the time to review this lens:

http://www.henrysnote.com/2013/11/nikon-af-s-nikkor-58mm-14g-review.html
http://www.dpreview.com/news/2013/11/13/lens-reviews-update-test-data-for-the-nikon-58mm-f-1-4g
http://neilvn.com/tangents/review-nikon-58mm-f1-4g-lens/
http://www.lensrentals.com/blog/2013/11/nikon-58mm-f1-4-is-hopefully-not-about-the-numbers
http://www.popphoto.com/gear/2013/10/new-gear-nikon-58mm-nikkor-f14g-full-frame-prime-lens
http://www.dxomark.com/Reviews/Nikon-AF-S-Nikkor-58mm-f1.4-G-lens-review-Premium-performer
http://www.cameralabs.com/reviews/Nikon_Nikkor_AF-S_58mm_f1-4G/
http://www.dpreview.com/lensreviews/nikon-58mm-f1-4g
http://photographylife.com/reviews/nikon-58mm-f1-4g

I watched:
http://www.youtube.com/watch?v=brNwWxZVdE4
and I would have to agree, the 58mm f/1.4g picks up more light than the 85mm f/1.4g. I will have to do a comparison with the 200mm f/2.0. ;)

Some notes on Focusing primes in the 1.4, 1.2 range and focus issues
http://diglloyd.com/articles/Focus/FocusShift.html
Main page:
http://diglloyd.com/articles/Focus/focus-accuracy.html


Monday, November 26, 2012

Atomos Ninja-2 on the Nikon D4


Using the Atomos Ninja-2 with the Nikon D4 (Now D4s and D810)

UPDATE: I now use the Ninja-2 with the D810 and the D4s. It works beautifully! There is no buzz on the HDMI Audio like there is on the Ninja blade and Shogun.

=Summary======================================================
Atomos Ninja-2 on Nikon
-Speeds up workflow significantly
-Focus Peaking works well
-Portable
-Starts/Stops recording as you enter and exit Live View, starting a new take for each cycle,  for easy control of recording.
=============================================================
Video on Youtube

Summary: Once set up all I have to do is start Live View (in video mode) and start the Ninja-2 recording. When I cycle the Live View button on the D4, the Ninja-2 starts recording when Live View is on and stops when I shut it off. Each time the Ninja-2 creates a new file for the next take. I turn on the Focus Peaking to ensure perfect focus and it stays on the whole time (does not reset when Live View is cycled). Perfection!

(C) Atomos 2012

The Atomos Ninja-2 is a recent addition to my toolbag. It is a HDMI video recorder and monitor. It connects directly to the mini HDMI out on the Nikon D4. The feature that I really love, besides being a recorder is that with Focus Peaking, it doubles as a monitor.

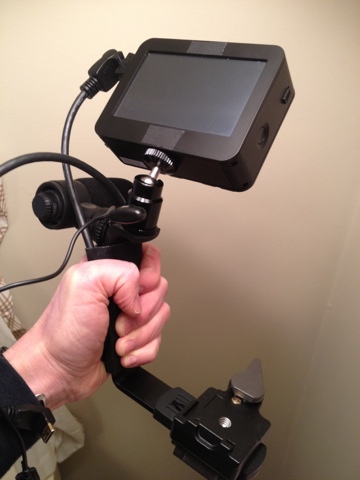
The Rig:
The Rig  (ignore the parachute cord and the Manfrotto 322RC2 squeeze handle mount)
Parts:
Vello CB-500 Dual Shoe Bracket - drilled and modified.
Manfrotto 323 RC2 with 200PL-14 Plate - and extra plate that was already on my camera. (See my previous post here)
1/4-20 bolt.


Putting it together:

First - Vello CB-500 Dual Shoe Bracket is not made to handle much weight. The hotshoe mounts will come right off. I removed the top hotshoe mount and drilled a hole to mount the Zylight Hot Shoe Ball Mount  through. The Zylight Hot Shoe Ball Mount  comes apart after removing a set screw and the bottom bolt can be removed and run through the hole drilled in the Vello CB-500 Dual Shoe Bracket. DO NOT USE THE HOTSHOT CONNECTOR ON THE TOP OF THE VELLO CB-500 TO HOLD ANY WEIGHT - IT WILL SNAP RIGHT OFF.

The Rig - basics without the Ninja-2 attached


I mounted the Atomos Ninja-2  on top of the Zylight Hot Shoe Ball Mount and the Nikon ME-1 Stereo Microphone on the side hotshoe mount. I then pulled apart one 200PL-14 and used a 1/4-20 bolt to connect the plate below to the Vello CB-500 Dual Shoe Bracket through to the base of the Manfrotto 323 RC2.
Manfrotto 323 RC2  - Vello CB-500 - 200PL-14 plate  Sandwich


This connection allows me to quickly connect the video rig to a tripod, and be able to quickly disconnect the camera from the video rig. (All I have to do is disconnect the HDMI and microphone connections and release the RC2.) This way I can shoot stills and attach the video rig all set up when I need to shoot video. When walking around on travel, it is very convenient to be able to pull gear out of a bag, use it and then put it away. Screwing and unscrewing multiple bolts is not very convenient for this. Also it is good to go with a proven clamp so you don't end up dropping thousands of dollars of gear. It will happen.

RC2 Quick release of D4 from Rig

D4 firmly attached to Rig (The handle clamp is the Manfrotto 322RC2 and is only there to hold the rig for the picture. It is not part of the rig.)


HDMI and Microphone connections


I connect the Zacuto 18" Right Angle Mini to Standard HDMI Cable from the Nikon D4 HDMI out to the HDMI in on the Atomos Ninja-2.

HDMI connection to Ninja-2


The Use:

I followed Thom Hogan's excellent post for setting up the Nikon D4 for the best video output.

I power up the Nikon D4 and the Atomos Ninja-2. I set the Video/Photo switch on the rear of the Nikon D4 to Video and press the Live View Button. I set the Atomos Ninja-2 to record and turn on the Focus Peaking. (To do this on the Ninja-2 press the yellow Mon button to start monitor mode, then the little camera shaped icon, then the man silouette icon. What is in focus will appear red on the monitor. Then I press the red circle in the bottom right to start recording.) I then press the Live View button on the D4 to shut off Live View. When I want to record, I just press the Live View button and the Atomos Ninja-2 starts recording a new take. When I press the Live View button again, the recording stops. In this way I can start and end each take with just the press of the Live View button on the rear of the D4 and there is no need to fiddle with anything else. (I noticed that the Ninja-2 recorded an additional file with less than a second of content on each cycle. I just discarded the extra files.)


Showing the Focus Peaking - See the Red in the eyes and on the mouth
This really is a good solution for me. Keep in mind that my background is in still photography and not video. I have done video editing with Adobe Premiere and Nuke in the past, but I have not been the primary shooter for video. I am sure that there are plenty of other solutions for video utilizing a professional HD video camera, but none of them will allow me to use the many Nikon lenses that I have acquired over the years. My objective was to have a video rig that was easy to attach and remove from my D4 so that I could quickly switch from still photo mode to broadcast quality video and back again.

The Atomos Ninja-2 does a lot of very good things for its price. The big plus for me are the Focus Peaking (Similar to what I use in Capture One Pro), recording trigger with the Nikon D4( Yes, there is really not technically a trigger, but it works just fine.), and the ability to use conventional hard drives and SSDs that can be hot swapped. There are also the Adjustable Zebra and False Color features for exposure, but I have not really utilized those yet. See the videos from Atomos here. I have used the Smartlog feature, but I find it quicker and easier to use Adobe Premiere to set my in and out points. With Adobe Premiere I can do my editing right on the Ninja-2 drive in the dock and output my compiled video. I use ProRes 422 and the new rolling shutter removal effect in Adobe Premiere CS6. The alternative of recording on the XQD or CF cards in the Nikon and then having to copy those files to a drive, uncompress the video to work with it, etc. is very time consuming and I would really alter what I consider to be an excellent workflow for me.


Check out:

Videos from Atomos here
Atomos Ninja-2 Review by Erik Vlientinck here
and

Cheesycam - Atomos Ninja-2 - There are some negative comments here. I wish only people who actually used a specific piece of gear wrote reviews and comments.

Rigs people use with it here - (you'll need to register for a login on this one.)
and here

Luminous Landscape did a review here. I like their review. What they say is true. They do mention the time required to copy and convert compressed video. The ability to just plug in the drive from the Ninja-2 into the drive deck that they provide and do your editing with Adobe Premiere right on the drive (without video conversion) is really the way to go for me. The alternative of copying and converting the compressed video from the 32GB XQD or compact flash card(s) to a drive for editing is very time consuming. The 750GB hard drive that I use with the Ninja-2 with no video conversion necessary makes the Ninja a great solution.

Another introduction by Larry Jordan here . He covers notes on using an external recorder as well.

Update:

I have substituted a Giottos MH-1104 mini ball head for the Zylight and put the ME-1 Microphone on top of the Ninja-2 with a Wooden Camera mount. This allows me to quickly disconnect the rig and shove it into my bag. (I have an older version Crumpler with velcro - I think that it is close to the current 7 Million dollar home.) Yes, the Wooden camera mount is a bit pricey, but is is the most compact and durable cold shoe that I could find that mounts right on top of the Ninja-2. Due to the request put up a quick video for it on Youtube

Update:
I have substituted the Manfrotto 492LCD Micro Ball Head  for the Giottos MH-1104.  The Manfrotto is way more sturdy (and heavier) and it really locks the monitor in place. I also use the Rode Video Mic Pro instead of the ME-1. Now I really use the Nagra SD recorder as well! That thing is just awesome!

Here are some additional pics. (Added some high res and retakes on request)


Atomos Ninja-2 Rig without Camera
Atomos Ninja-2 Rig with Nikon D4
Atomos Ninja-2 Rig - High Res

Atomos Ninja-2 with Nikon D4 Video Rig - High Res


Update:
=====================================================================
Newer Rig with
Vello Triple Shoe
Manfrotto 492 LCD ball head
Nagra SD
with the D4s and the D810


Oh - and Yes I still use the Rode Video Mic Pro on occasion when I want to cut out a lot of ambient sound.